
Hogwarts Legacy follows a young fifth-year student on their quest to rid the wizarding world of a terrible evil. Shortly after arriving at Hogwarts School of Witchcraft and Wizardry, the protagonist will be given the freedom to explore the world and uncover the secrets scattered throughout.
Some secrets in Hogwarts Legacy, however, can only be found by completing certain tasks. In order to unlock the Depulso Puzzle Rooms, the player will first need to progress in the main story and complete a rather challenging side quest. Once this has been accomplished, the player will be able to find and enter the two Depulso Puzzle Rooms hidden inside the castle.
How To Unlock The Depulso Puzzle Rooms In Hogwarts Legacy

In order to access the Depulso Puzzle Rooms, the player will first need to have completed The Helm of Urtkot main quest and then complete The Hall of Herodiana side quest.
Upon completing this side quest, the player will then be able to unlock the two Depulso Puzzle Rooms by casting the Depulso spell on the stone tablets blocking their entry.
Depulso Room 1 Location

To find Depuslo Puzzle Room 1, players should fast-travel to the Potions Classroom in The Library Annex. From there, they should proceed through the door ahead of them, turn left, and continue walking down the stairs. They will then reach a door with a Level 1 Lock that, when opened, will reveal the entrance of Depulso Puzzle Room 1.

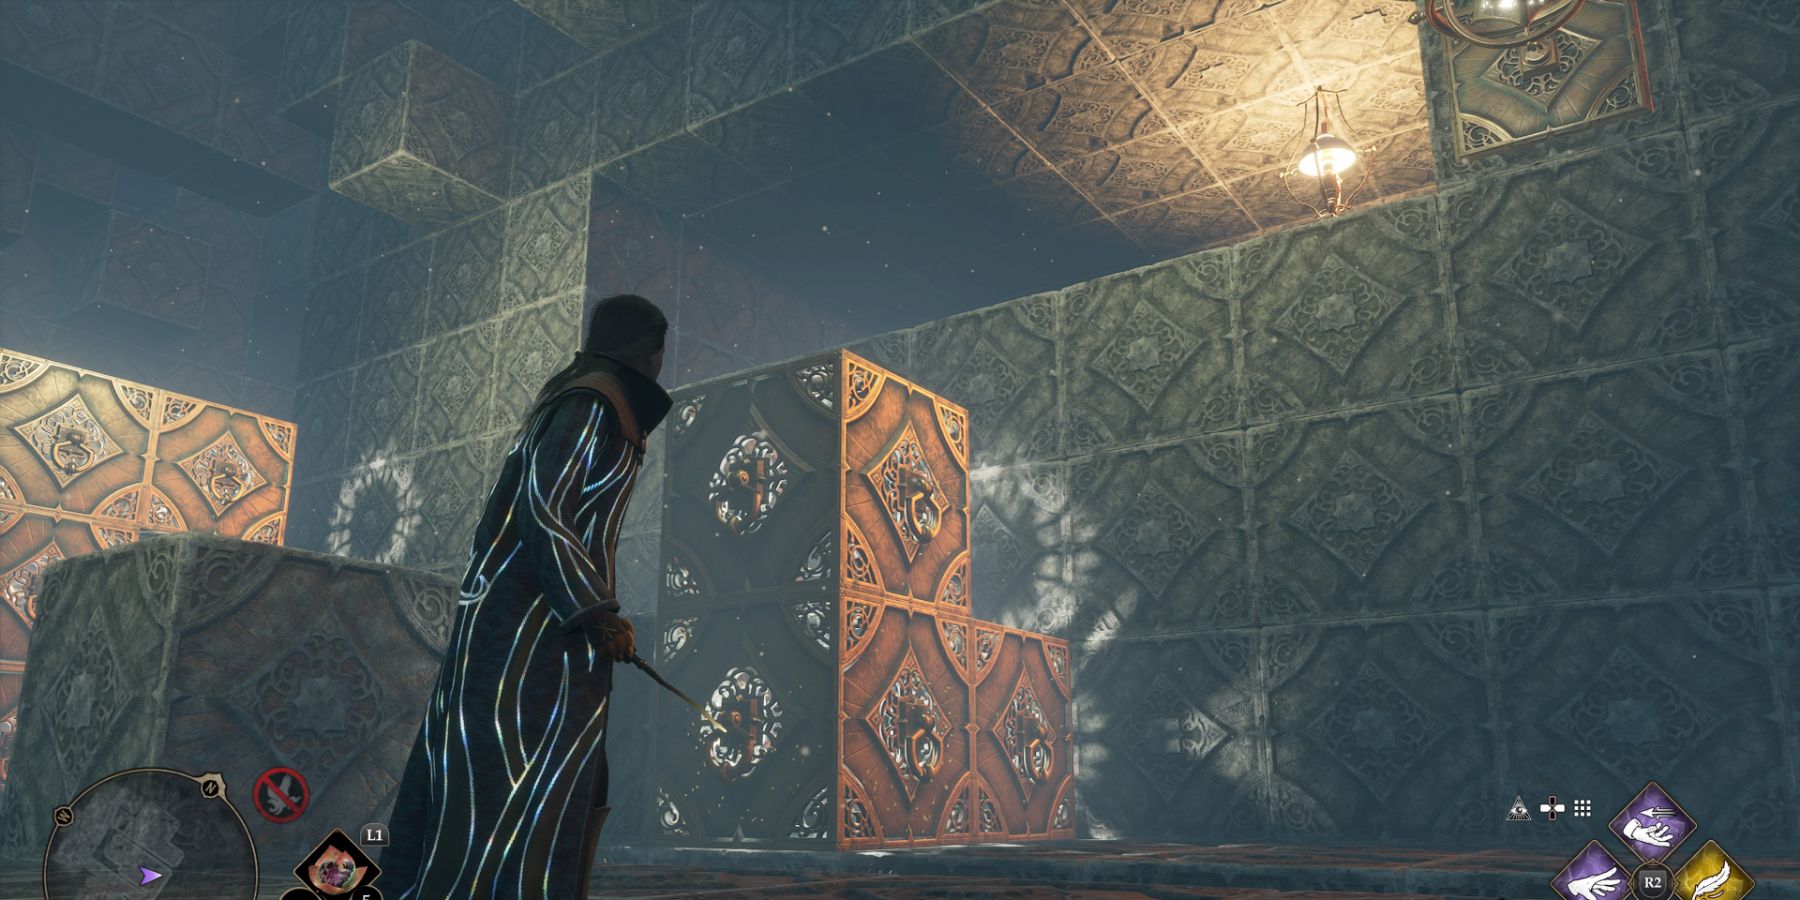
On the other side of the door, the player should proceed through the archway and approach the wall on the right. Casting Depulso on the stone tablet here will cause the wall to open, granting the player access to Depulso Puzzle Room 1.
Depuslo Puzzle Room 1 Solution

In order to proceed through Depulso Puzzle Room 1, players will need to complete three separate puzzles. Completing these puzzles requires the player to relocate blocks with Accio and Depulso to create a path forward to reach the chests scattered around the room.
It's quite easy to lose one's bearings while moving these blocks, so if players feel they have made a mistake, they should reset the room by casting magic at the golden orb above.
How To Solve The First Puzzle In Depulso Room 1

Upon entering Depulso Puzzle Room 1, the player will need to proceed down the hallway in front of them in order to reach the first puzzle. In order to get the first chest in this room, they should cast Accio on the floating block on the right and pull it west.

Next, the player should jump down to the floor below and approach the two blocks in the center of the room from the left-hand side. Depulso should then be used to send these blocks south. These two blocks can then be climbed to reach the chest higher up.
How To Solve The Second Puzzle In Depulso Room 1

To reach the second chest in this room, the player should cast at the golden orb above to reset the positions of the blocks they moved. Then they should return to the lower level and use Accio on the southern floating block to send it north.

Accio must then be used on the same block to pull it west. Then, Depulso should be cast to send the block north, and Accio should be used to move it east, just above the two blocks on the ground.

Accio can then be cast on the floating block in the center of the arena to bring it west. This block will then connect to the one below it, allowing the player to cast Depulso to send them both north.

The player should then cast Accio on the connected blocks to move them east. Once this has been done, the blocks can be climbed to reach the second chest in the room.
How To Solve The Third Puzzle In Depulso Room 1

The player will need to reset the room again in order to reach the third chest. To create a way to reach it, Depulso should be cast at the westernmost block to send it north. Then, the same cube should be connected to the two nearby cubes with Accio, which will connect all three together.

The three cubes should then be moved south with Accio and then sent east with Depulso.

Once they are in place, the player should cast Depulso on the two blocks in the center of the room to send them east.

The three connected blocks should then be moved north to the center of the room with Accio. Depulso should then be cast on the two eastern blocks to send them north.

Next, the three connected blocks at the center of the room should be sent east with Depulso. Then, they should be sent north with Depulso again.

To reach the third treasure, the player must climb the dark block near the edge, jump onto the three connected blocks over the hole, and climb up to the top of the pillar. Once all three chests have been opened, the player can return to the entrance and find a new chest containing a decorative item for the Room of Requirement.
Depulso Puzzle Room 2 Location

To find Depulso Puzzle Room 2, the player should fast-travel to the Bell Tower Courtyard in The Bell Tower Wing. From there, they should travel up the stairs on the left and proceed through the door straight ahead. Continuing forward, they should enter the classroom at the end of the hallway and approach the door with the Level 1 Lock.

Once this door has been unlocked, the entrance to Depulso Puzzle Room 2 can be found inside at the back of the area on the right-hand side. Casting Depulso on the wall's stone tablet will cause the wall to open, permitting players access to Depulso Puzzle Room 2.
Depulso Puzzle Room 2 Solution

Like with Depulso Puzzle Room 1, players must first travel through the hallway ahead in order to reach the puzzle. They will then find themselves in a room full of movable blocks and will be required to move them around in order to reach the chests scattered throughout the room.
How To Solve The First Puzzle In Depulso Room 2

The player should cast Accio on the T-shaped block at the back of the room to bring it west. Then they should drop to the lower floor, approach the single block just north of the T-shaped block, and move it east with Accio.

The blocks at the south side of the room should then be brought north using Accio and should then be sent east with Depulso.

These same blocks should then be sent north with Depulso, which will cause them to connect to the floating block in the corner.
 These three connected blocks should then be sent west with Accio, which will allow the player to climb up to the northern ledge and find the first chest in Depulso Puzzle Room 2.
How To Solve The Second Puzzle In Depulso Room 2

Once the chest has been opened, the player should cast Accio on the T-shaped block to send it west.

Then, the floating block just beside the T-shaped block should be moved north with Accio. Accio should then be cast on this block to send it east.

Once the floating block has been moved, the player should cast Accio on the other block next to the T-shaped block to send it east as well. When it reaches the other side of the room, players will see that there is actually a second block attached to it.

These two blocks must then be moved north, which will cause them to connect to the floating block above.

The two southern blocks in the center of the room should then be brought north using Accio. Accio should then be used again to send these two blocks east.

These blocks should then be sent north to connect them to the three connected blocks in the corner.

These five connected blocks must then be sent west with Accio and then south with Accio again.

The T-shaped block can now be moved south with Accio and then east to make them connect with the other five connected blocks.

This bizarre-looking structure can now be climbed by jumping over the gap just behind it on the left-hand side and climbing the block on the right. At the top, the player can continue through the doors in front of them to begin the next puzzle.
How To Solve The Third Puzzle In Depulso Room 2

Upon entering the final puzzle room, the player should drop down to the lower floor and cast Depulso on the three stacked blocks in the center of the room to send them south.

Accio should then be cast on the stacked floating blocks just to the right to move them north. The player should then climb onto the H-shaped block they just moved, approach the southern edge, and cast Accio on the three stacked blocks to move them west.

The player will then be able to jump from the H-shaped block onto the three stacked blocks to find the first chest in this room.
How To Solve The Fourth Puzzle In Depulso Room 3

The player should then jump back to the H-shaped block and cast Depulso on the three stacked blocks to send them into the southeastern corner of the room.

Next, Accio should be used to send the multiple blocks in the southeast corner north. Accio must then be used again to bring these blocks west, where they will collide with a pillar.

The four connected blocks near the entrance of the room must then be pushed east using Depulso. Then, the same four blocks can be sent south with Accio.

Accio should then be cast on the three stacked blocks in the southwest corner to send them east and connect them to the four blocks that were just moved.

These blocks can then all be sent north with Accio, which will allow the player to climb them to reach the second chest in this room.

The cubes the player just climbed can now be sent back to the southern corner of the room with Depulso. The player will then need to climb back on top of the H-shaped block and cast Accio on these cubes to move them west.

Once they have been moved, the player can jump from the H-shaped block to the floating black block just southeast, then jump onto the blocks leading to the blocks that were just moved.
Upon climbing the block at the southern wall, the player will find a chest containing a decorative item for the Room of Requirement. To leave, they can interact with the door at the end of the hallway.
Hogwarts Legacy is available now on PC, PS5, and Xbox Series X/S. PS4 and Xbox One versions will release on April 4, and a Switch version will release on July 25.